If you’re new to growing marijuana, it can sound like such a huge and expensive undertaking…
That even though the idea of it interests and intrigues you…
You get overwhelmed by the idea of having to spend $1000s, plus the huge amounts of information on the topic…
…and eventually, put the idea on hold.
But the truth is:
Growing your own marijuana is far easier and cheaper than you might imagine.
All you need is a few basic supplies. And it doesn’t have to cost you more than $600 for an indoor grow, and much less even for an outdoor grow.
In fact:
It will save you HUGE amounts of money after the initial investment. Why? Because you’ll produce more buds than you can smoke.
And they will be so potent and tasty…any herb you had before will pale in comparison.
Which is why in today’s post you will learn:
- The first steps on how to grow your own marijuana;
- The different growing setups, and;
- A list of basic, marijuana growing supplies to get you kickstarted…
Let’s get to it.
Table of Contents
- Growing Marijuana Indoors vs Outdoors
- Hydroponic Growing vs Soil Growing
- Growing Indoors: 10 Essential Supplies
- Essential Supply 1: Marijuana Seeds
- Essential Supply 2: Grow Lights
- Essential Supply 3: Grow Medium
- Essential Supply 4: Nutrients and Supplements
- Essential Supply 5: Pots & Buckets
- Essential Supply 6: Ventilation
- Essential Supply 7: Thermometer
- Essential Supply 8: pH and PPM Testing Tools
- Essential Supply 9: Carbon Filter
- Essential Supply 10: Grow Tent
First, you have to decide on…
Growing Marijuana Indoors vs Outdoors
While the general consensus is that indoor growing is ‘better’…
The fact of the matter is, whether you should grow in- or outdoors, all depends on your specific circumstances.
Let me explain.
Growing indoors takes more skill, maintenance and is less forgiving…
But if you know what you’re doing, the quality of your nugs will be out of this world in terms of:
- Density;
- Flavor, and;
- Potency.
That doesn’t mean the quality of your yield will be bad in an outdoors grow…
It’s just easier to more potent and dense nugs in an indoor grow.
For example:
One study compared THC-percentages of different-grown cannabis in New Zealand. Indoor-grown cannabis had significantly higher THC-concentrations than outdoor-grown cannabis (1).
On the flipside:
If you’re going for quantity, an outdoor grow will out-yield an indoor grow by a pretty large margin, with the same number of plants.
For example:
A study compared cannabis yield in different growing conditions. Outdoor plants yielded more ounces per plant than indoor plants (2).
In an outdoor grow, your marijuana plants will be larger and full of vigor. The larger your plant, the higher your yield.
So as a general rule of thumb:
- Growing marijuana indoors takes more skill and maintenance, but will produce a higher quality yield;
- Growing marijuana outdoors takes less skill and maintenance, will produce lower quality yield, but a much higher yield with the same number of plants. And it’s much cheaper.
But these are not the only differences you should consider…
If you want a year-round harvest and are not living in a tropical climate…you only got 1 choice: growing indoors.
Now, growing indoors does actually bring some extra benefits with it:
- Your marijuana plants will be much less vulnerable to thieves and animals pecking away at your babies. Keep your plants for you and you ONLY.
- It’s much easier to clone your plants. To get yourself free and extra crops of your best plants.
But growing outdoors brings some additional benefits with it as well:
- It’s much cheaper. All you need are some pots and quality soil.
- You’re growing your plants how Mother Nature intended it to be, which probably has some benefits that are yet unknown.
- If you use a greenhouse, you eliminate many typical outdoor problems like pests and dust pollution.
For most people growing indoors just seems to be the more practical method. Not everyone has a private garden and marijuana thieves are a serious problem.
Next up we have another one of those age-old debates…
Hydroponic Marijuana vs Soil

Is hydroponic growing better, or soil?
Again, there is no ‘better’ method.
But here’s the deal:
When you’re just starting out, I highly recommend you start out with soil, because:
- It’s cheaper;
- Easier to maintain (costs less time), and;
- Much more forgiving than hydroponic growing.
Besides these main benefits growing in soil has a few added benefits like:
- Your marijuana will taste better;
- It’s better suited for small spaces (if you’re short on space);
- It’s more natural, so probably has more hidden benefits (I don’t believe we are smarter than nature).
Reading all these benefits, you might be wondering:
Are there any reasons to choose hydroponic growing over soil?
Yes, there are.
If you’re prepared to:
- invest your time and learn hydroponic growing properly, and,
- accept that maintenance time will be high when you’re learning the ropes…
Hydroponic growing actually is an extremely rewarding growing method.
Let me explain.
Because it’s easier to control the whole growing process, especially:
- the amount and pace of nutrients,
- oxygen, and,
- CO2 your plants receive,
you’ll receive some benefits over soil.
Benefits like:
- Quicker harvest cycles because of reduced vegetation times. Which means more total yield for you;
- Increased yields per grow;
- Easier to get more potent yields;
- Higher density planting leading to increased yields per square foot.
Hydroponic growing is ‘power growing’ and is the highest yielding grow method.
But this only holds true IF you apply the techniques and maintain your grow PROPERLY.
There’s even scientific evidence for this.
For example:
One study found that cucumber plants grown in a hydroponic system had a higher growth rate than cucumber plants in soil (3).
There are different types of hydroponic growing, which you can learn about here:
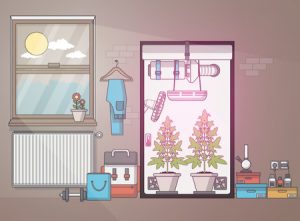
Next up is a list of growing supplies you’ll need to get started growing indoors. Because let’s be real:
Indoor growing is what most of you will do.
Growing Indoors: 10 Essential Marijuana Growing Supplies
Any marijuana plant needs 4 essential elements to grow:
- Light;
- Water;
- Nutrients, and;
- Air.
This means that the growing supplies which provide these 4 elements are essential.
But to grow marijuana properly indoors, you’ll need a few more extras that support these 4 elements.
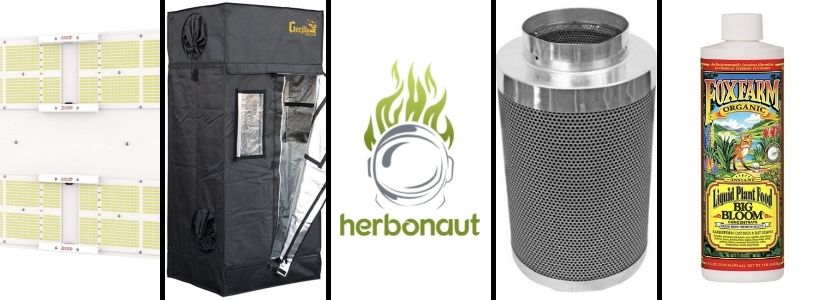
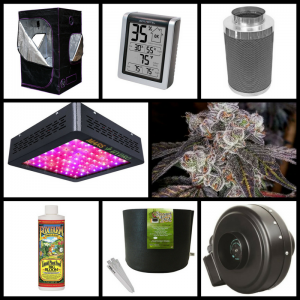
Without further due…here’s what you’ll need for a proper indoor growing setup:
- Marijuana Seeds;
- Grow Lights;
- Medium to Grow (Soil, Hydroton, etc.);
- Nutrients and Supplements;
- Pots or Buckets;
- Ventilation;
- Thermometer;
- pH and PPM Testing Tools;
- Carbon Filter;
- A Grow Tent.
You might be thinking:
Those are a lot of supplies and the list sounds expensive.
Well, here’s the deal:
If you’re going to grow in soil and going for a 4ft x 4ft space with 1-5 plants, you can easily stay under $650. And your lights will be the main expense here.
In such a grow-setup you can easily yield 4 pounds (1800 grams) of smoke-able high-quality herb.
And if you didn’t know already…
$650 for 4 pounds of quality herb is more than 10 times cheaper than a marijuana dispensary or pharmacy. At a dispensary or pharmacy you would pay 4 x $1750 = $7000 for the same amount.
Now:
If you’re going to grow hydroponically, depending on which system you go for, the cost can add up quickly to over $1000. Why? Because you’ll need more supplies.
But even this is 7 times cheaper than buying your marijuana at dispensaries.
Now let’s dive deeper into each item on the list…
1. Marijuana Seeds

Captain obvious speaking:
You can’t grow marijuana without seeds (unless you clone, but I assume that’s not an option for you at this time).
And the quality and strain (genetic make-up) of your seeds will have a MAJOR impact on your results.
One study found that cannabis variety, which starts with the seed, was the single biggest factor that impacts the yield of cannabis plants (4).
You ensure the quality of your seeds by buying them from a reputable seedbank. Always do your due diligence before buying cannabis seeds. These are our recommended seedbanks.
But your specific strain is also a topic to think about.
If you’re looking for a specific effect, of course, go for a strain that is known to produce that particular effect.
But with your first grow, you will want an easy grow and a large yield.
For beginners, I recommend Indica-heavy strains. Why? Because they flower faster, and will produce a larger yield than Sativa-heavy strains.
Indica-heavy strains are more compact, which means they need much less space. Plus, they’re more forgiving in case of growing mistakes.
Here are some tried and tested Indica-heavy strains:
- Northern Lights Autoflower Fem. – (CropKingSeeds – Worldwide / Seedsman – UK)
- Purple Kush Feminized – (CropKingSeeds – Worldwide / Seedsman – UK)
Now, if you really want to grow Sativa-heavy strains, I recommend you take a hybrid. Because 100% Sativa strains are not well suited for compact indoor growing setups.
Below are some Sativa-heavy strains, that are actually decent for indoor growing:
- White Widow Fem. – (CropKingSeeds – Worldwide / Seedsman – UK)
- Sour Diesel Feminized – (CropKingSeeds – Worldwide / Seedsman – UK)
Next up we have your piece that will have to replace the sun…
2. Grow Lights
Since you’re growing indoors…
You’re going to have to replace sunlight, which is by no means an easy task.
Most beginning growers are scared of the electric costs of a grow light. They think it will quickly add up into the hundreds.
While this is true for certain types of grow lights, covering large spaces…
A high-quality LED light will hardly add something to your electric bill.
Currently, the best LED grow lights are those with white light and supplemental light covering the far- and deep-red spectra.
Plants thrive when exposed to all wavelengths within the range of ‘photosynthetically active radiation’. For example, green light and far and deep red wavelengths were deemed useless. But they play an important role in plant photosynthesis (5, 6).
Classic example:
- Spider Farmer SF – (EpicLEDGrowLight > 3% off coupon code: HERBONAUT/ Amazon)
There are many more options when going for a LED light and I cover some of the best here:
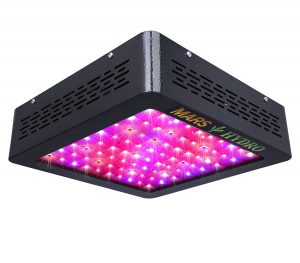
Now, the initial investment is higher if you go for a LED light though.
The other option you have is an HPS light. HPS is cheaper initially. But HPS will use more electricity and comes with replacement costs. You’ll need to replace HPS every 1-6 months, depending on the quality of your light.
Do realize that ventilation will be more important with an HPS light. Because it generates way more heat than a LED light. So don’t cut corners when buying an exhaust fan if you decide to go for an HPS light.
An HPS light will need a ballast for power and a hood/reflector which reflects all the light to your plants.
If you’re starting out, an easy option is to get a full HPS grow light kit which includes both the ballast and the hood.
Classic example:
- Apollo Horticulture 400 Watt Grow Light Digital – (Amazon)
A general rule of thumb with grow lights is to get 50 watts per square foot.
Let’s say you get a 4×4 tent. Then you will need 16×50 = 800 watts.
You have 2 options here:
- Get 1x 1000W light, or;
- Get 2x 400W lights.
Getting 2x 400W lights will be better for your yield. Because you can position two lights more easily and optimize the spread of your light.
But, if you’re going for an HPS light at least, getting 1x 1000W will be cheaper.
If you buy pre-made lights you won’t need any hanging ropes.
But if you go for a DIY light, you will definitely need a way to hang your lights.
The most secure and flexible (flexible as in easily adjustable height) to hang your lights is with:
- Rope Ratchets – (Amazon)
Next up we have your…
3. Growing Medium
Since plants can’t float around in the air…
You also need a growing medium to support your plants.
What type of growing medium you use, is fully dependent on whether you’re growing in soil vs hydroponics.
If you choose to grow in soil, you’ll need (surprise, surprise) soil as a growing medium.
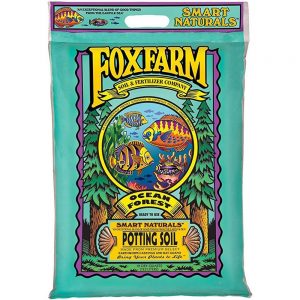
An easy way to get started is with pre-made soil which is ready for use straight out of the bag.
Classic example:
- FoxFarm Ocean Forest – (Amazon / Grower’s House)
If you choose a hydroponic system, you’ll need an inert medium like hydroton or lava-rock.
Classic example:
- Hydroton – (Amazon)
Another important note here is that soil is a supplier of nutrients and an inert medium like pebbles isn’t. It’s just there to hold your plant in place.
And that’s why the nutrients and feeding schedule with soil are different than with a hydroponic system.
As you will learn when we talk about the building blocks of your marijuana plants…
4. Nutrients and Supplements
 Nutrients When Growing in Soil
Just like every living organism, your marijuana plants need nutrients to grow.
Without nutrients, no plants.
But what kind of nutrients you need depends on:
- Whether you’re growing hydroponically or with soil, and;
- If you’re growing in soil: whether you’re growing in organic super-soil, organic high-quality soil, or regular soil. Regular soil is not recommended.
If you’re growing in organic super-soil you only need a small amount of nutrients to:
- adjust nutrient-strength levels, or,
- work out a deficit after the first few weeks when you’re plants are deeper into their vegetative stage and/or start to enter their flowering stage.
But most of the nutrients will already be in your soil. And you might even overfeed your plants by adding extra nutrients.
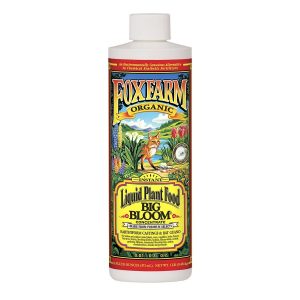
Still, even with organic super-soil, it can be helpful to add small amounts of nutrients to your plants. Especially once they get into their flowering stage.
Classic example soil-based organic nutrients:
- Fox Farm Big Bloom Fertilizer – (Amazon / Grower’s House)
Now, if you’re growing in regular soil, you’ll definitely need a good set of quality nutrients.
But I don’t recommend growing in regular soil. Because it’s much easier to grow in organic super-soil packed with nutrients.
Nutrients When Growing in a Hydroponic System
When you’re growing hydroponically, it’s your water that provides the nutrients.
And since water naturally doesn’t have the nutrients your marijuana plants need…
You will definitely need nutrients.
When you mix water with nutrients, that’s what’s called your nutrient solution. And you will feed your plants with your nutrient solution.
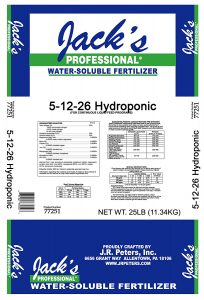
Classic example nutrients for hydroponic systems (you need to combine all 3):
- Jacks Hydroponic 5-12-26 Jack’s Professional – (Amazon)
- Jacks Calcium Nitrate 15.5% Nitrogen 18% Calcium – (Amazon)
- Pennington Epsom Salt – (Amazon)
Remember that your plants will need a different nutrient profile per growth stage. The main difference here is the vegetation stage vs flowering stage. Check out this page for a guide on nutrient profiles for marijuana when growing hydroponically.
Next up we have…
5. Pots & Buckets

Since we’re growing indoors and can’t make use of the ground…
We’ll need something to put our growing medium and plants in like pots, buckets or containers.
Now, if you’re growing in soil smart pots are great to start with.
Why smart pots?
Because they really do protect you from some common mistakes like:
- Overwatering;
- Bad soil;
- No root binding;
- Root rot.
They are a bit more expensive than regular pots but well worth the price.
The size of your pots depends on your grow space, but if you want decent-sized plants go for at least 5-gallon pots.
Classic example:
- Smart Pots 5 Gallons – (Amazon / Grower’s House)
If you’re growing hydroponically you don’t need fancy pots.
Usually, you’ll use buckets.
And if you get a pre-made hydroponic system, the buckets come with your system. Getting a pre-made system is recommended if you’re a complete beginner to hydroponic growing.
Classic example:
Next up we have the lungs and cooling mechanism of your grow environment…
6. Ventilation

If you’re going to replicate nature…
Your plants are going to need a steady flow of fresh air with CO2.
And the best way to provide them with fresh CO2-rich air is through proper ventilation.
But there’s another very important reason why you want proper ventilation…
High temperatures can quickly destroy your crop. And proper ventilation keeps the temperature in your grow room / grow tent in check.
Proper ventilation consists of 3 parts:
- Active air exhaustion;
- Passive or active air intake, and;
- Air movement.
For proper ventilation, you need all 3 of these elements to be present.
Depending on your budget you have many options to buy ventilation supplies…
But when you’re starting out, there are 4 essential things to keep in mind:
- Know the volume of your grow area / grow tent (4x4x6 ft. = 105.6 cubic ft.);
- Get a fan that has AT LEAST a Cubic Feet per Minute (CFM) rating that is equal to the volume of your grow area / grow tent;
- If you’re going to get a carbon filter (to filter unwanted smells) add 25% to that number;
- Get a centrifugal inline fan;
- An exhaust fan is more important than an intake fan.
For beginners, I recommend using a passive intake and an inline exhaust fan that satisfies the above requirements. A passive intake is made with a hole or 2 on the opposite end of your exhaust fan in your grow tent.
If you’re going for an inline intake fan, make sure to get a fan that’s 10-15% less powerful than your exhaust fan. This is because you want to keep negative pressure in your grow space. Negative air pressure ensures all the air passes through your carbon filter.
Classic example:
- Hurricane Inline Fan 4 in 171 CFM – (Amazon / Grower’s House)
Here’s how you hang your fan:
- Rope Ratchets – (Amazon)
Next up is the…
7. Thermometer
Every plant has a temperature at which the greatest level of photosynthesis takes place.
But with marijuana it’s even a bit more complicated:
Different strains have different temperatures at which they produce the most potent buds.
To create the perfect environment for your strain it’s important you keep the temperature in your grow tent at this optimal level.
For this, you really need a thermometer.
Without it, you have no clue whether the temperature in your grow area is at this optimal level.
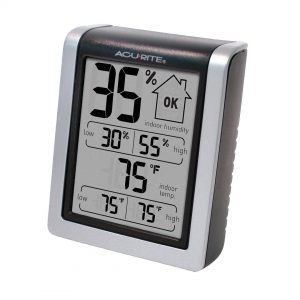
Now, a basic thermometer is cheap, and all you need when starting out.
Classic example:
- AcuRite Indoor Humidity Monitor – (Amazon)
Next up are the essential toolkits…
8. pH and PPM Testing Tools
Marijuana plants not only have an optimal temperature to grow…
It’s ESSENTIAL that you keep the pH levels of your soil or nutrient solution, at an optimal level as well. as well.
pH refers to the acidity or alkalinity of your soil or nutrient solution.
Why is this so important? Because pH affects:
- Nutrient availability;
- Nutrient leaching;
- The bacteria in your soil, and;
- Your soil structure.
Get your pH wrong and your plants will suffer severe malnutrition. It’s very hard to save a crop if it had prolonged malnutrition.
Either the potency and taste of your buds will SUCK or your plants will flat out die.
The optimal pH-levels:
- Hydroponic grow: pH 5.5-6.5 or game over;
- Soil-based grow: pH 6.5-6.8.
It literally is a matter of life-and-death for your plants…
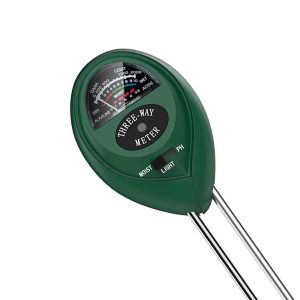
Luckily there’s a very handy tool that will help you keep the pH in check: a pH-meter.
Now, soil and water (hydroponic growing) have different pH meters. So don’t buy a pH-meter before you’ve decided on soil vs hydro.
Classic example pH-meter SOIL:
- Dr.meter 3-in-1 PH Acidity Tester – (Amazon / Grower’s House)
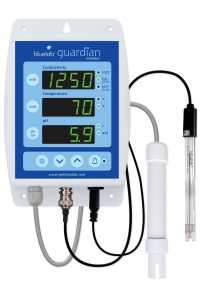
Realize that when growing hydroponically it’s important you get a quality pH meter that works in water. Because your pH will be more susceptible to fluctuations than when growing in soil. Plus, when you’re growing hydroponically you want a quality PPM-/EC-meter as well. Which means it’s best to immediately get a combo-meter (pH and PPM).
A high-quality pH-/PPM combo-meter isn’t cheap. And it’s one of the reasons why growing hydroponically is quite a bit more expensive than growing in soil.
Classic example pH- and PPM- / EC-meter HYDRO:
- Bluelab Combo Meter – (Amazon / Grower’s House)
It’s also important you actually have an easy way to adjust your pH when it’s off.
Again, this is especially true if you’re growing in a hydroponic system because of the potential swings in pH values.
Soil actually acts as a natural buffer, as long as you feed your plants with a slightly alkaline nutrient solution (above 7 pH).
You can easily do this with a pH control kit:
- General Hydroponics pH Control Kit – (Amazon)
Then the EC/PPM/TDS Meter…
The question is: do you really need one?
If you grow in soil it’s useful but not necessary.
But if you’re growing hydroponically, you will definitely need one.
Here’s why:
Your nutrient-strength level is more variable when growing hydroponically.
When growing hydroponically, your plant’s roots are directly exposed to the nutrient solution. In this scenario, small fluctuations in strength levels can have a huge impact on the growth of your plants.
Combine this with the fact that your plants need different nutrient strength levels at different stages in their grow cycles…
And you’ll quickly understand why a PPM-meter is important when growing hydroponically.
If you give your plants fewer nutrients than they need, you’ll severely stunt their growth. And if you give them more nutrients than they need, you risk burning your plants.
With a PPM-meter, you can measure the nutrient strength of your soil or nutrient solution. This way, it’s easy to keep the nutrient strength at the optimal level.
Classic example:
- Bluelab Combo Meter (pH and PPM) – (Amazon)
For an overview of recommended nutrient strengths per growth stage, click here.
Next up is the…
9. Carbon Filter
Even though I absolutely LOVE the smell of weed…
I don’t really want my whole house smelling of marijuana.
But when you’re growing indoors, this really can be a problem.
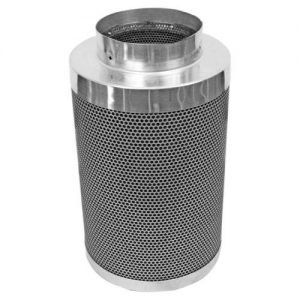
Luckily, there’s an easy way to eliminate 95% of the smell: a carbon filter.
So although this is not an essential tool to grow your marijuana, it is essential if you care about odor.
In the ventilation chapter, you learned that you should get an exhaust fan that has a CFM rating that’s at least equal to the volume of your grow area / grow tent.
Your filter should be the same or close to the CFM rating of your exhaust fan.
Classic example:
- Phresh Filter – (Amazon / Grower’s House)
Do realize that choosing an isolated spot for your grow is much more effective than any filter.
And lastly the…
10. Grow Tent
Although a grow tent isn’t absolutely essential…
If you’re growing indoors a good grow tent is highly advisable.
The other option you have is to grow in a room or closet.
And while it might seem unnecessary to get a grow tent, if you have a spare room or closet…
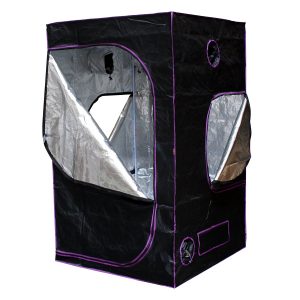
A grow tent will ease and support your growth process in many ways:
- Easier to control pests;
- Light reflection (helps your plants grow stronger and faster);
- Lightproof environment (prevents stress on your plants);
- Isolation (of smell and infections);
- Easy temperature and humidity control (prevents stress on your plants).
With a properly setup room or closet, you’ll have exactly the same benefits…
But if you’re a beginner, getting a grow tent will save you loads of time and effort.
Besides a quality grow tent is easy to move, very affordable, and will last you at least a couple of years.
These are the best grow tents I recommend:
Classic example
:
- Apollo Horticulture Grow Tent – (Amazon)
What’s Next…
You now know which supplies you need for a basic indoor growing setup.
But this is only half of the story.
Now you need to know how to set up your growing space…
And how to actually grow your marijuana.
Which is what we will cover in the next post:
Scientific References:
- Poulsen, H., & Sutherland, G. (2000). The potency of cannabis in New Zealand from 1976 to 1996. Science & Justice, 40(3), 171–176. https://doi.org/10.1016/s1355-0306(00)71972-1
- Bouchard, M. (2008). Towards a Realistic Method to Estimate Cannabis Production in Industrialized Countries. Contemporary Drug Problems, 35(2–3), 291–320. https://doi.org/10.1177/009145090803500206
- Vanhove, W., van Damme, P., & Meert, N. (2011b). Factors determining yield and quality of illicit indoor cannabis (Cannabis spp.) production. Forensic Science International, 212(1–3), 158–163. https://doi.org/10.1016/j.forsciint.2011.06.006
- Vanhove, W., van Damme, P., & Meert, N. (2011). Factors determining yield and quality of illicit indoor cannabis (Cannabis spp.) production. Forensic Science International, 212(1–3), 158–163. https://doi.org/10.1016/j.forsciint.2011.06.006
- Smith, H. L., McAusland, L., & Murchie, E. H. (2017). Don’t ignore the green light: exploring diverse roles in plant processes. Journal of Experimental Botany, 68(9), 2099–2110. https://doi.org/10.1093/jxb/erx098
- Li, D., Li, W., Zhang, H., Zhang, X., Zhuang, J., Liu, Y., . . . Lei, B. (2020). Far-Red Carbon Dots as Efficient Light-Harvesting Agents for Enhanced Photosynthesis. ACS Applied Materials & Interfaces, 12(18), 21009–21019. https://doi.org/10.1021/acsami.9b21576