 Today you’ll learn how to use a dry herb vaporizer.
Every vaporizer has somewhat of a learning curve to really optimize its performance. But there are 5 essential vaporizer tips that will optimize the performance of ANY vaporizer.
And in today’s post, you’ll exactly learn what these 5 tips are.
From:
- Grinding your herb, to;
- Packing your bowl, to;
- Using the right draw-technique, to;
- Keeping your vaporizer clean,
We cover it all.
Grind Your Weed According to Your Vaporizer-Heating-Type
 Using the grind that’s appropriate to your particular heating system is very important if you want proper vapor production.
There are 3 types of heating systems:
- Conduction
- Convection
- Hybrid (a combination of conduction and convection)
Conduction
With a pure conduction vaporizer, you want to grind your herb as fine as possible. Powder-fine usually works best, but depending on your vaporizer, this could lead to herb particles ending up in your mouth. If you’re going to grind powder-fine, make sure that your vaporizer’s bowl can handle it and the herb just doesn’t fall through the screens.
Here’s why you want a fine grind with a conduction vaporizer:
In conduction-style heating, your herb gets heated by directly being exposed to a heated surface. The finer your herb is ground, the more particles will get exposed to this heated surface. And the more particles are exposed to the heated surface, the more even the heating will be (less ‘hot spots’).
Tip: to grind your herb powder-fine, use a regular grinder to pre-grind your herb, and after you’ve pre-ground your herb, use a finishing grinder like the MFLB Finishing Grinder, which can be found in our list of best herb grinders.
Convection
With a pure convection vaporizer, use a medium grind.
In convection-style heating, your herb gets heated by hot air. So you want to maximize airflow in your bowl. If you use a fine grind, airflow will be severely restricted by the compactness of your herb.
Another style of packing/grinding with convection-vaporizers that’s worth trying is the following:
- Place a whole nug of flower in your bowl;
- Take 2-3 draws to make your nug crispy (produces light but extremely flavorful vapor);
- Use a pick/stick to crush the nug up within the bowl;
- Take large and powerful rips (you will get big clouds of vapor).
Hybrid
With a conduction-convection hybrid vaporizer, it all depends on the ratio of conduction/convection.
The more conduction there is, the finer your grind has to be.
Generally speaking, it works best to go somewhere in between medium and fine.
Pack Your Bowl According to Your Vaporizer-Type
 Filling your bowl up appropriately is one of the most important parts of using a vaporizer properly.
Here’s why:
If your vaporizer isn’t filled appropriately, your herb won’t get heated properly…and your vapor production and vapor quality will SUCK.
Filling your bowl appropriately is a 4-step process:
1. The minimum amount of herb that’s needed: cover the bottom surface area of your bowl
With any vaporizer that I’ve ever tried, the minimum amount of herb that was needed in the bowl to produce satisfying hits was the amount that’s needed to cover the bottom surface area/bottom screen of the bowl with herb.
2. Don’t overpack your bowl with convection-style vapes
It’s never a good idea to FULLY pack your bowl. Always pack your bowl 80-90%, never more. This is especially important with convection-style vaporizers.
3. If you pack your bowl less than 50%, use a screen / liquid pad to compress your herb
This just really helps with the performance of any vaporizer I’ve noticed, convection or conduction.
4. Loose vs tight pack: convection vs. conduction
With a convection vaporizer, it’s important to pack your bowl loosely so the air can pass through every part of your herb. Note: this doesn’t necessarily hold true if you fill your bowl less than 50%, if you pack loosely with less than 50% of the bowl filled, it can be too loose with some vapes.
With a conduction vaporizer, you want to pack your bowl relatively tight. Compress your herb at least somewhat.
Tip: if efficiency is important to you (if you want to save money), a small bowl forces you to be efficient. In our advanced guide on how to find the most efficient vaporizer, you can read why and get tips on how to be really efficient with your vaporizer.
Use the Right Draw-Technique
Using the right draw-technique is very dependent on your specific vaporizer.
Here are some general tips though that work with 80% of the vaporizers:
- Draw for at least 5-10 seconds;
- Draw slowly and controlled with most vaporizers;
- Realize that vapor doesn’t feel like smoke, it’s WAY more subtle.
For specific draw-techniques per vaporizer check out our dry herb vaporizer reviews.
Use the Right Temperature
Different vaporizers have different temperature control systems.
But all of them fall into one of these 3 categories:
- A precise temperature control system (temperature controllable in 1 to 5-degree increments);
- An interval-based temperature control system (temp controllable in 10+ degree intervals);
- A fixed temperature control system (1 temperature).
With any of these temperature control systems, the MINIMUM your vaporizer needs to reach in the bowl, for you to feel ANYTHING at all is:
- 315°F / 157°C (the boiling point of THC)
But keep in mind this is the temperature your vaporizer needs to reach in the herb chamber. Most vaporizers show the temperature of your heating element. The temperature in your herb chamber will naturally be a little bit lower than the temperature setting of your heating element.
So add a couple of degrees to the minimum setting. I would say the following temperature is a good benchmark for the minimum your vaporizer temp setting has to reach:
- 338°F / 170°C
But even this will be too low for high-tolerance vapers. The best temperature to vape herb for most users is 356°F(180°C). I still recommend always starting low (338°F/170°C) and slowly work your way up, as this is best for efficiency and the easiest way to find your perfect temperature setting.
If you’re an ex-smoker:
I still recommend following this path of starting low and slowly working your temperature up, but realize that you’ll probably need the higher temperature settings to feel satisfied.
Also, I might be stating the obvious here, but give your vaporizer enough time to fully heat-up. This is all dependent on your specific vaporizer and ranges from 10 seconds to 15 minutes (for some desktop vaporizers).
If you really want to dive deep into vaping temperatures, check out our advanced guide on how to choose the best temperature to vape weed.
Keep Your Vaporizer Fresh and Clean
 Whatever vaporizer you have, it’s important to keep it in its best condition by cleaning/maintaining it regularly.
Every vaporizer has 3 crucial parts that need to be clean at all times so that it performs optimally at all times. And even more important, these parts need to be clean because resin (leftovers from your herb) is acidic and can corrode especially plastic parts of your vaporizer.
Keep your vapor path clear of any resin
Resin is the build-up of oily residue that weed leaves behind when it gets heated. The airflow will be severely restricted if you let resin build up in your vapor path, and the performance of your vaporizer will take a hit.
Keep your bowl clean
With convection-style vaporizers, this is important because your airflow will be restricted if old chunks of weed are in your bowl. You might even be tasting already vaped bud (AVB), and trust me this won’t be tasting well.
With conduction-style vaporizers, old chunks of weed in your bowl will form a layer of protection around your fresh herb. And that’s exactly what we don’t want since our herb needs to get exposed to the heated surface fully.
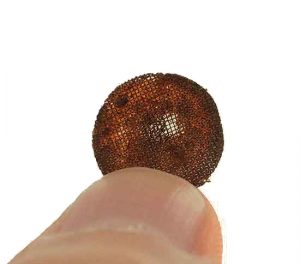
Keep your screens clean or replace them
The screen(s) in your vaporizer serve an important function:
They prevent weed particles from passing through your vapor path and ending up in your mouth. Having weed particles in your mouth every time you take a draw makes for a rather unpleasant vaping experience.
In the process of stopping these particles at the gates, your screens will get dirty and get clogged. A clogged screen will stop your vapor at the gates as well. And since this vapor is exactly what we want to inhale when we’re vaping, it’s important to have an un-clogged screen.
Usually, your screen(s) can be found close to your bowl. Either above it or at the bottom.
Conclusion
While most people blame their vaporizer for its bad performance, you, on the other hand, learned that these people probably just have no idea how to use a vaporizer properly.
With the 5 tricks you’ve learned in this post, you’ll be able to use any vaporizer properly.
Of course, for every vaporizer, there are vaporizer-specific tricks to really optimize its performance, and those can be found on the vaporizer review pages.
Check out our vaporizer reviews if you’re looking for a new vaporizer or just interested in seeing the latest vaporizers.
If you enjoyed this post and want more, become a fan on Facebook, and click share to spread this timeless and unbounded vaporizer knowledge ;-).